One of Greg's long time friends is going to be a dad in a few weeks, and I thought it was the perfect excuse to try this out!
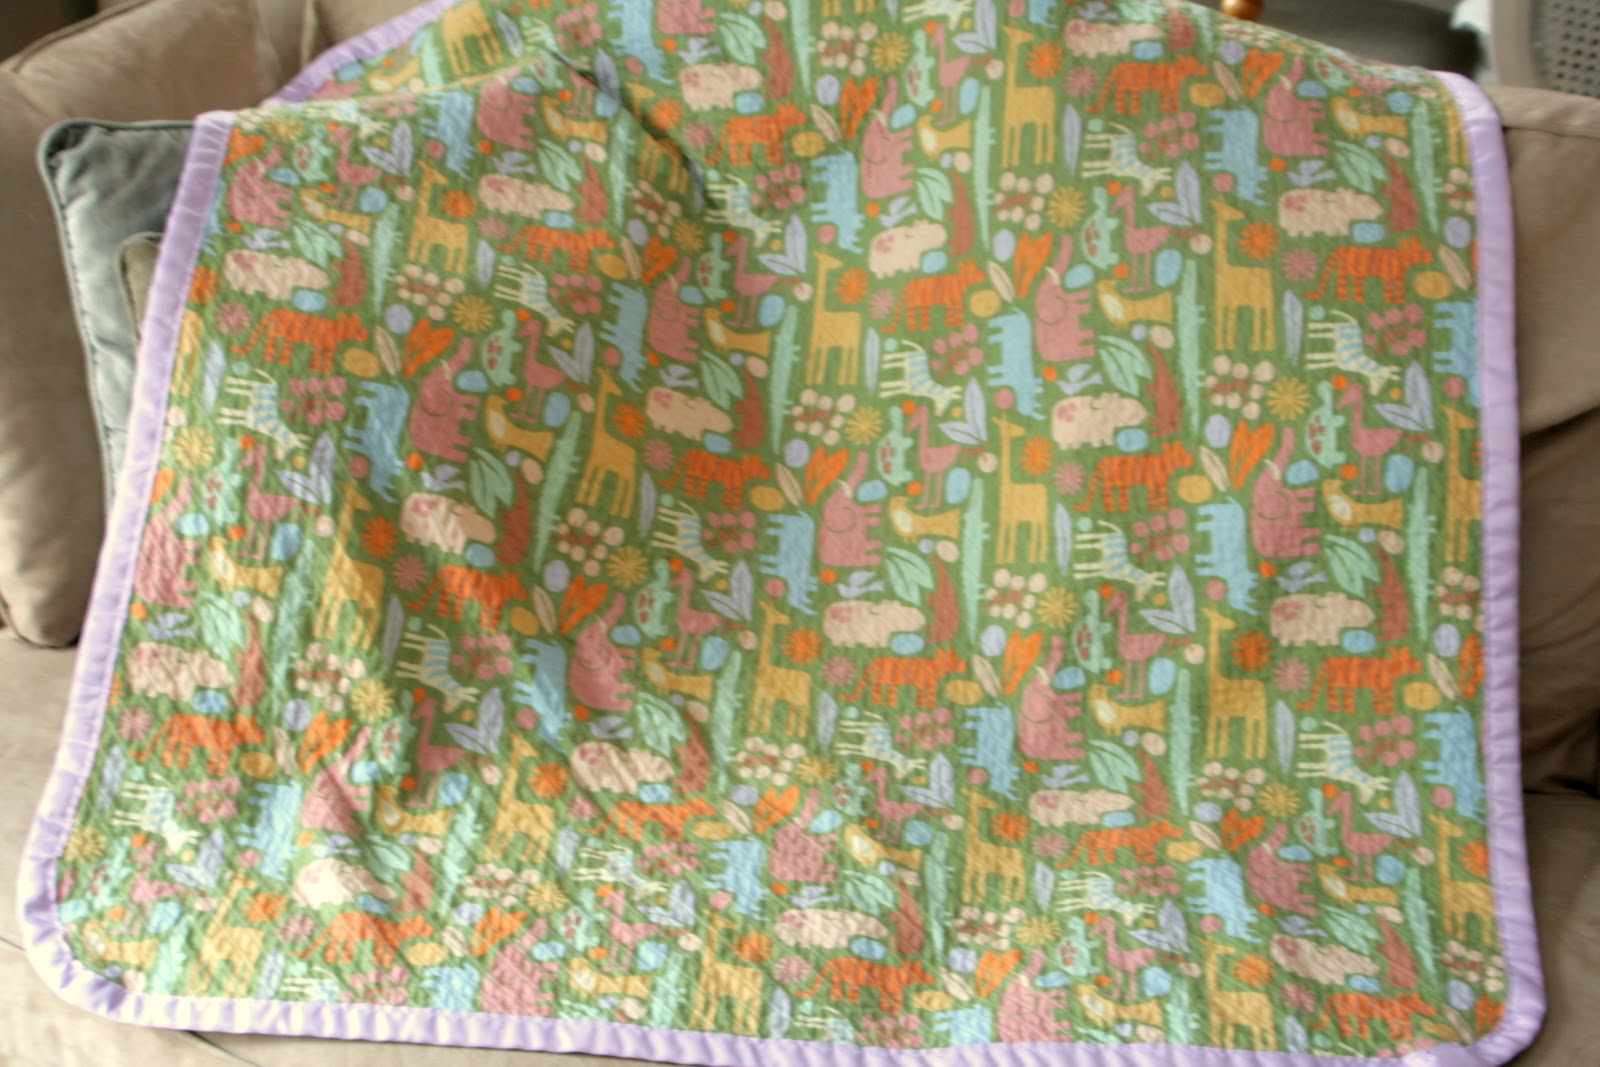
The mom to be told me she had chosen an animal theme for their new baby girl's nursery. I'm pretty sure she actually said zoo or jungle...but I can't remember now which. Either way, I found this fabric at Joann's and thought it would work great, with pink and lavender but not too girly.

I followed the tutorial almost exactly as written. Basically you take a square of cotton, and 3 squares of flannel & quilt together on the bias.
The quilted lines you sew end up being channels of flannel (haha..sorry). This part took A. LONG. TIME. But just find a Say Yes to the Dress marathon on TV and time passes a wee bit quicker. Before you know it, you are done the quilting, and ready to cut.
As expected, my 4 layers shifted quite a bit during the quilting process, and so I had to even up the edges quite a bit. As a result, my blanket turned out to be more of a rectangle than a square...but still very much the same effect. And babies don't care about geometry.
The directions talked about a chenille cutter to cut your rows of flannel. I had never heard of one...but can see now why I would want one! Scissors worked fine though, despite the painfully stiff hand after. I was very paranoid about cutting the front fabric, so I cut super slow. Might be a reason for the rigor mortis.

Here is my blanket after I had cut the flannel and binded the edges. The directions said to cut your store bought 2 inch satin binding in half and make a skinnier binding. I wanted

Aaaaand....voila!


...it turns out all soft & cozy, just how babies like it.
4 comments:
You are right babies do not care about geometry. :) That turned out BEAUTIFUL. Can I order one in an adult size? haha Great job!
How creative. I'm very impressed! It will be baby's favorite blankie!
I have no idea how you did this but it is amazing! What an adorable blanket my friend!! She is going to just LOVE it!!
beautiful! i had a friend in college who made one of these...they're super cool...i like the fabrics you chose!
Post a Comment