Showing posts with label decor. Show all posts

Tuesday, April 12, 2011

Pottery Barn Knock Off: Nursery Word Plaques

I have spent many a night searching the beloved internet for nursery decor for Baby G. Forever ago, I fell in love with these word plaques from Pottery Barn...

As usual, I didn't love the $150+ price tag...so like any good DIY gal, I made my own!
{Excuse the horrible backdrop. I was out of ideas on how to photograph them since I couldn't hang them on her nursery wall...it's not even close to being put together yet! The only space I found that was big enough was our glamorous cement patio...gorgeous right?!}

I loved them first for the simplicity of the idea...taking pretty colors easily pulled from the nursery..
And I also loved the idea of using simple words with a simple meaning. 
I changed the "laugh" to "dance"...(this mama has a soft spot for dance in her heart!)
And how appropriate was this one since her daddy's a pilot!
But all the words make me smile, since they're all things that I hope our baby grows up to do!

Pottery Barn's plaques are painted. I am by no means an artist, so I took an easier way out. 
Follow along and I'll show you how I made mine using:
 wood, craft paint, scrapbook paper, and Mod Podge.

I picked out a patterned scrapbook paper and a coordinating solid color for each plaque. Then I matched up a tube of craft paint to match each paper. Since I was making 5 plaques, I had 5 different designs of paper, 5 different solid colored papers, and 5 different colors of craft paint. You'll need a few pieces of each patterned paper, depending on how big each plaque is.

First, I bought a 10 foot piece of 8 inch wide pine at Lowes. It was around $8. I had my hubby cut out 5 lengths of board, according to the dimensions shown on the Pottery Barn website. {I decided to not use the name plaque since I plan to put her name into the room elsewhere.}
If you don't have power tools, you can have these cut FOR FREE right at Lowes or Home Depot when you buy the board! {We had our big long board cut into two sections so that it would fit into our vehicle.}

Next, I painted the edges and sides of each plaque.
Then, I cut the patterned scrapbook paper to fit each plaque, and used Mod Podge to glue it to the front of the board. I just used a foam brush and slathered the Mod Podge onto the board, and placed the paper carefully in place. Make sure to smooth it out quickly with your finger tips to get all the air bubbles and wrinkles out. I added Mod Podge on top of the seams and the edges to make sure they didn't peel up.
Then came the not-so-fun part. I printed off letters from Microsoft Word and cut them out...to use as a stencil to trace onto the solid colored paper, to then cut out again. Does this make sense? Probably not. And this was probably not the quickest way to do this. {The quickest way would have been to put myself out of my misery and buy a Silouette! Siigh.} But this seemed to be the easiest, and cheapest, way to me. However you want to arrive at it, you're going to need the letters of each word cut out of the solid scrapbook paper.

Once you have all your letters cut out, glue them onto the boards with more Mod Podge!
Finally, apply a finish coat of Mod Podge (or you can use spray sealer) over the entire board. It will all dry clear & protect your hard work. Woohoo! You're done!
Now hang those pretty plaques on the wall and make your little one smile!

{Of course these could easily be changed up to go in a little boys room! The best part about making something yourself is that its 100% customizable!}

Linking to:
Blue Cricket Design


Photobucket


Monday, March 14, 2011

Simple Solutions: A Large Area Rug on the Cheap

Our master bedroom here in our rental has beautiful hardwood floors. This I love. But I didn't love how cold the floors were on my bare feet in the morning. We needed an area rug to go underneath our bed.

I decided I wanted something roughly 10x12 feet so that it would fit under the bed and have a nice overhang on either side. There was just one problem. Area rugs this large are not cheap! And not to sound like a broken record, but when furnishing a temporary space...cheap inexpensive is the answer to every problem.

So when walking through Home Depot, I spotted a bin of 6x9' shag area rugs for $29.99 each. They weren't the highest of quality, but really, who could pass up such a deal?

So we bought two, brought them home and duct taped them together!
You can hardly even see the seam in the middle, since it's basically hidden underneath the bed.
So for $60, we have a 9x12' area rug that does a great job of keeping my toes nice & toasty in the morning.
A simple solution to what could have been an expensive problem.

Wednesday, February 2, 2011

Felt Rosette Wreath

This was a Christmas present that I made for my Mom, but would make a super cute Valentines Day wreath!
Start with a $4.00 grapevine wreathe. Then make about a bajillion felt rosettes. Ok, not that many, but I did use probably 30 or so. I used all white roses and I also cut a few leaves out of green felt. Felt at my craft store was on sale, so I spent about $1.00 on all the felt!

These little buggers aren't hard to make, but here is an excellent tutorial from another blog, Mrs Priss, to get you started.
Then just hot glue em on wherever your little heart desires.

Finally, I added a piece of burlap at the top & a cream ribbon tied in a bow to hang it on the wall with.


Use red and pink felt for a super cute Valentines Day wreath! Or pastels for Easter! Or whatever your little heart desires. At less than $5.00 per wreath...make one per holiday!

Wednesday, January 12, 2011

Wall worthy bulletin board

I have newly discovered how much I love a clean looking fridge. Since we moved into our rental home, I hadn't put anything on our fridge - no magnets, pictures, papers. Nothing. And I like it. A lot. It really makes the kitchen look cleaner. And oh how I love when things are clean.

So where to put all that "stuff" that used to be on the fridge? How about a small bulletin board to put up in our laundry area, which is just off the kitchen. Being in a rental, I am really trying not to buy anything to fit this space...since we plan to buy a more permanent home in the next year. So I went "shopping" around my house for ideas.


I had this frame, which the glass had broken out of years ago. For some reason I kept it through our million moves. (So unlike me!) But it was the perfect frame to upcycle into a bulletin board...

I also found a package of cork tiles, which I bought a few months ago at the craft store for $3.97. I can't remember why I bought them now...but at less than $4, who cares!

I took the cardboard out of the frame to use as a guide, and placed it over 2 of the tiles. I tried to make the seam of the tiles centered in the middle...

I wanted to hide the seam, so I wrapped a piece of ribbon around the tiles where the seam was, and hot glued it in place on the back. To even it out, I repeated the ribbon a third towards the top and the bottom of the frame.

Now just put it all back together!

Add some homemade felt roses & some cuuute kiddos...and you have a {super cheap} wall worthy bulletin board! (And a clean fridge!)


Linking to Blue Cricket Design for a Show & Tell Wednesday Link Party!

Sunday, January 9, 2011

Ikea, how I love thee!

Hello old friends. I should probably acknowledge the fact that I haven't posted anything in like 8 years. I have many excuses. Exhaustion? Laziness? Bedridden with sickness? Visiting family & friends? Christmas chaos? Traveling? Laziness probably wins.

But I have better things to talk about. Because today...today I feel in love. With Ikea. I know I'm totally behind the times with this one, but I had yet to make it into one. But it was worth the wait, let me tell you!

A little background story. My husband and I have 2 dressers. One is not appropriate for any person of the age of 5 to use, which I have conveniently hidden placed in our closet. The other is my college dresser which I bought at a yard sale for $7 ten years ago. Convincing my husband that we needed to replace either was like convincing Jillian Michaels that Little Debbie Snacks are good for you. But somehow, I did. (The former, of course.)

Traditional furniture stores and their somewhat "stalker" sales people kind of make me cringe. Which is why we set off on our maiden voyage to Ikea in search of a new dresser for our bedroom. We meandered through the store, stopping to look at, sit down, test out, & examine all the pieces in the showroom. The store is really set up like a maze, but it's very smart, in that you don't really ever feel lost...but you end up looking at everything they offer, even if you didn't want to. We were there for bedroom stuff, which in order to get to, you have to head through the living room, kitchen, etc. areas. I didn't mind. And not one sales person will bother you, pressure you, or stalk you. Genius.

And then half way through the store-maze they conveniently put the Ikea restaurant. Which is genius. Because at this point you are basically thinking...if only I had a snack to keep me going. And I must say the Swedish Meatballs are SO. YUMMY. And my husband and I both ate lunch for less than $8. When has that ever happened? (Never.)

The moral of the story is that we found our dressers. Yes, not ONE but TWO new dressers! They were such a great deal that we decided we might as well get two. We chose the Hemnes 8 drawer dresser and the Hemnes 3 drawer chest to come home with us:

Images from www.ikea.com

So I think we all owe a big thank you to the Swedes for bringing us IKEA, my new Hemnes dressers, and all 20 of those Swedish meatballs G & I shared for lunch. Yum, yum, yum.

Friday, October 29, 2010

New chairs and a song.

{I can't help but have this song running through my head as I type up this post. Read on, and you'll see why. :) }

The husband and I have THE oldest "dining" table & chairs ever. It's actually really a breakfast table. That I bought 10 years ago. At a yard sale. It's embarrassing to say the least. I'd show you a picture of it, but I'm ashamed. We are long overdue for an upgrade.

We went to a furniture store. G picked out a chair style he liked, and asked the saleswoman how much it would be. "$600", was her reply. "Oh, for all 6?" G asked. "No, $600 per chair." She replied again. I thought G was going to fall out of the overpriced chair from a heart attack. I picked him up off the floor and we left the store.

Ok...maybe I need to go another route if I ever want to dine in style.


So as I was wondering through my local thrift store the other day, I saw these babies....

I looked them over. And pondered. And deliberated. And ultimately I left the store. I wasn't thinking straight.

But then I started driving home...and couldn't stop thinking about them! They're just chairs, I know. But I loved their curvy lines, Frenchy look, and that I could add in some texture with fabric. They were sturdy, lovely ladies in hiding. I had to let them out. So I went back, and bought them up! 
$100 for all 5.

I brought these lovely ladies in waiting home. 

{I also found an upholstery remnant at Hancock Fabric for $3.50/yard. I brought home 3 yards. The fabric was wide enough, that one yard covered 2 chairs.}

A little sanding, and priming, and painting, 
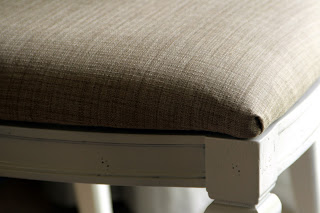
and some new fabric staple gunned onto the seats...

And, hello gorgeous.

Love this fabric...and not just because it was on clearance. I just love how crisp it looks.

And look at those legs! She must work out.

Isn't she lovely? 
And at less than $25 per chair...even lovelier.

Now I'm off to find that perfect table.


I'm linking up to The Shabby Nest's Frugal Friday!