At first I thought this was a ridiculous project. But anyone who knows me for longer then 5 minutes will know that I love the 80's. When I told my husband that I was making Baby G a jean jacket, he replied "The sooner we educate her about the 80's, the better!" {See why I married this man?!}
So I quickly snapped out of it, realizing that a denim jacket for a newborn was a completely practical idea.
And Baby G now has her very own denim jacket!

Complete with cute little cuffs...

And itty bitty pockets {very practical for storing her hot pink lipstick or the keys to her Thunderbird.}


All made out of an old pair of jeans rescued from the Goodwill pile!
Does your baby need his or her own jean jacket? Of course they do.
Follow along, I'll show you how.
Follow along, I'll show you how.
As a reference, here I made a size 3 month jacket out of a pair of Old Navy size 4 jeans. This tutorial has lots of steps so is a little long, but I tried to use a lot of pictures and keep it as simple as possible!
Cutting out your pieces.
Start with an old pair of jeans and a sweatshirt, jacket or sweater the size you want the jacket to be. You'll use this as a guide when cutting out your pieces.
 Using your sweatshirt as a guide, cut out the section of the pant leg that is the same length as your sweatshirt.
 Now, open up the pant leg so you have a wide piece of denim.
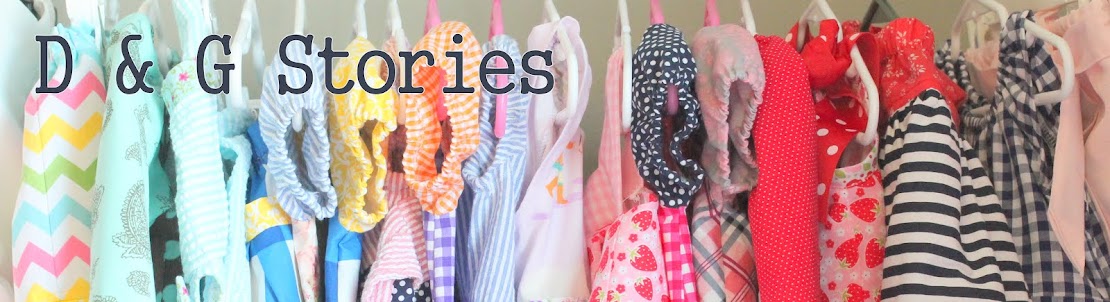
 Using your sweatshirt as a guide, cut out the back piece of the jacket out of the wide piece - centering the seam down the middle of the back. Cut out the front pieces as well, which I cut out of another section of the pant leg. As long as the pieces are symmetrical, they don't have to be perfect. You should end up with 3 pieces like this:
 Next, using your sweatshirt sleeve as a guide, cut out the sleeves. (I wanted the detail of the jeans pant leg seam to show on the sleeve of the jacket, so I cut accordingly. You don't have to, but I think it adds a more "authentic" look!)
 You should have two sleeve pieces that look like this:

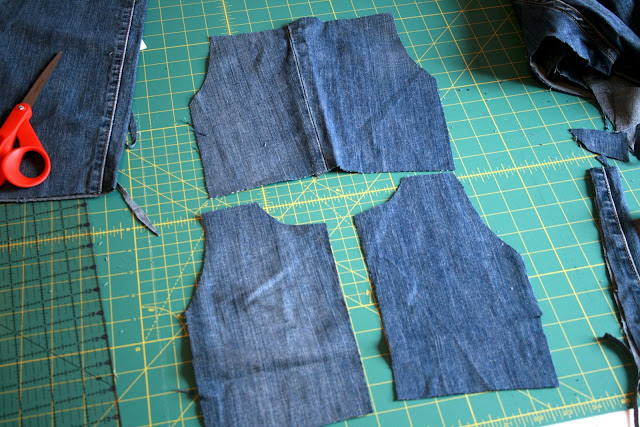
 I didn't picture it, but you'll also want to use your seam ripper to remove any belt loops.
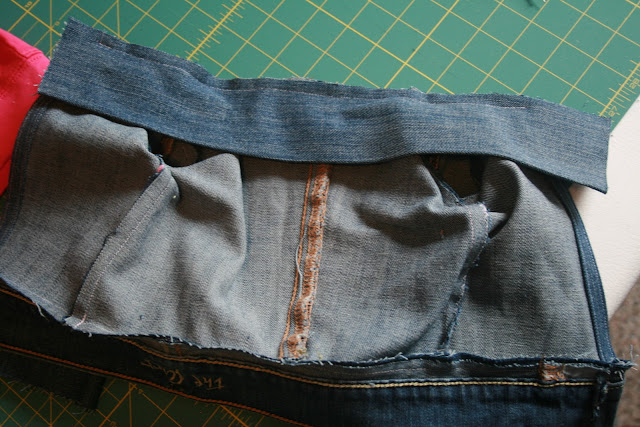
Next, you'll want to cut a long strip of denim out of the pant leg. I didn't measure this, but it was about 5 inches by 24 inches. Iron this in half, wrong sides together, like below.

Sewing it together.
Take your two front pieces and iron the inside edge toward the wrong side 1/4 inch, then again a 1/2 inch. Pin, then stitch.
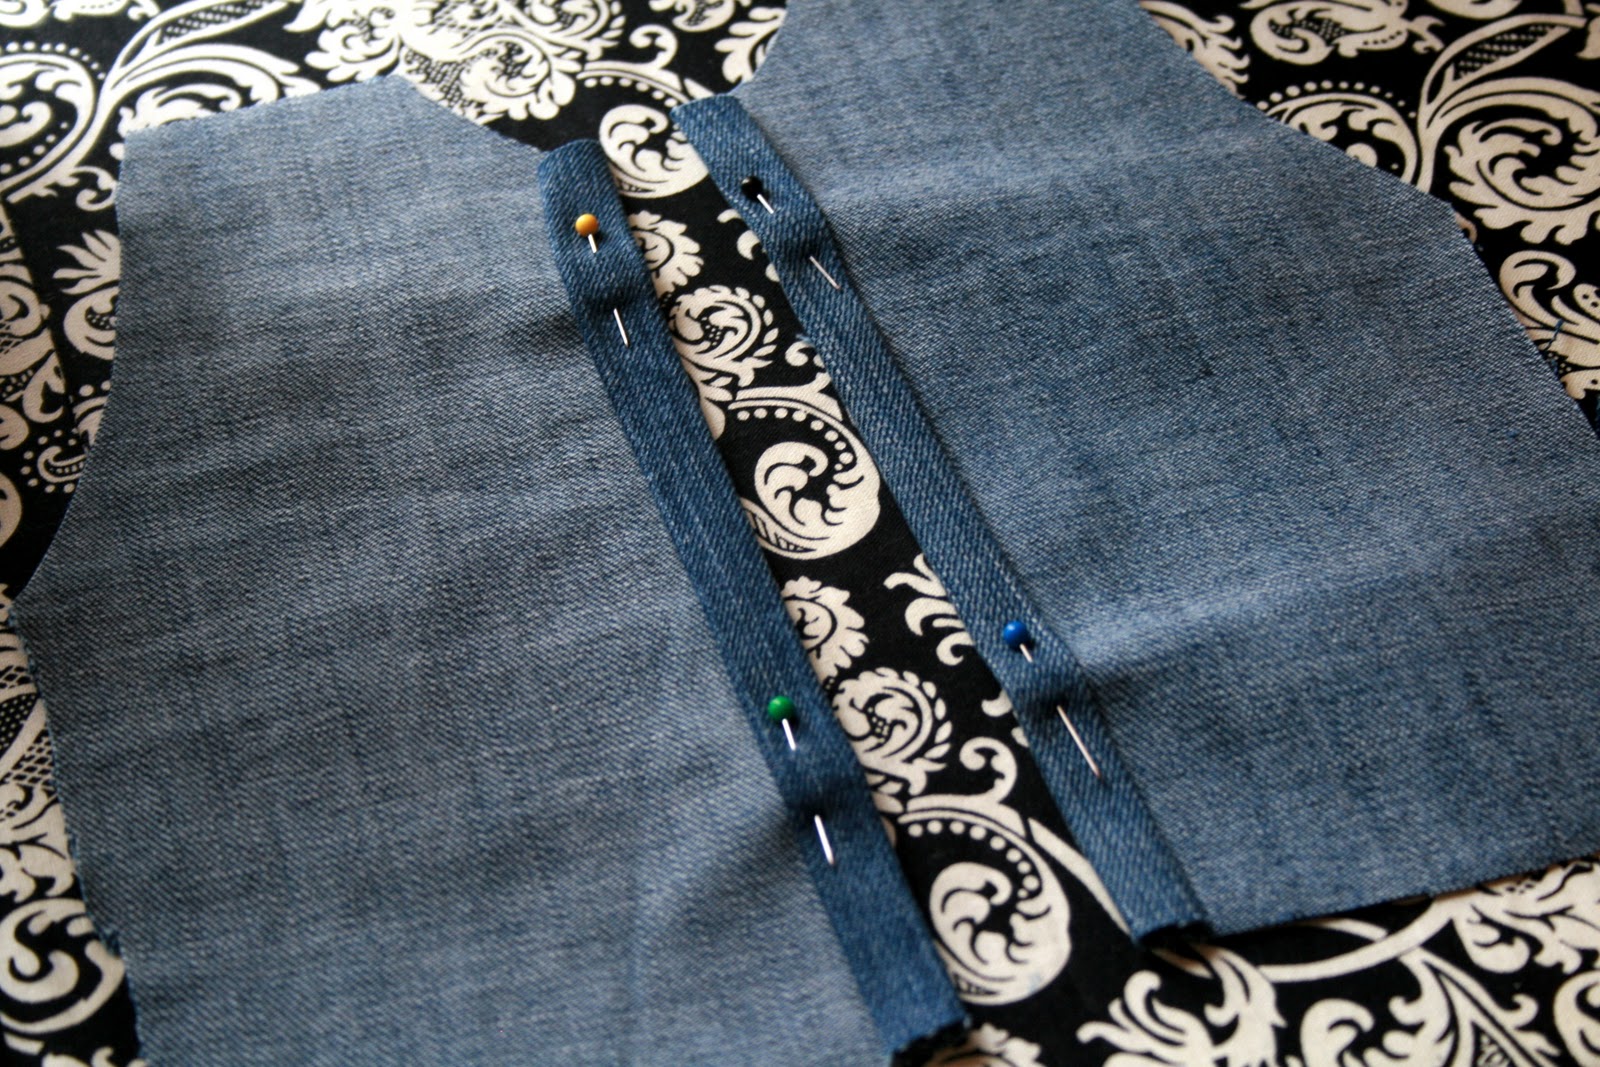
 Place front pieces on top of back piece, right sides together. Pin at outer sides.
 Stitch together. Do not stitch the arm holes though! (You may also want to zig-zag the edges to prevent future fraying.) Open up seams & press.
 Next, with right sides together, stitch along the top of the jacket, from the arm holes to the neck hole, on each side. (Realized I forgot a picture of this part.)
Next, take your sleeve pieces and with right sides together, stitch up the open side. Turn right side out. Press.
 Now pin the sleeve into the sleeve opening of the jacket, with right sides together.
 Stitch together. Turn the jacket right side out, and press. Your jacket is starting to look like a jacket!
 Take the jeans waist band you cut earlier. Cut a section long enough to fit along the bottom of your jacket, and two pieces for your sleeve cuffs. Turn the edges of each piece in and stitch.
 Pin the long band to the bottom of the jacket, right sides together. Sew together.
 Pin the cuff to each sleeve, right sides together. Stitch together. (This part was difficult, as the sleeve opening is itty-bitty. It might be easier to sew your cuffs on before you stitch your sleeve closed!)
 Now we're going to sew on the collar. Take the long folded band of denim you cut earlier. Open up your jacket, right side facing down. Pin the band, raw edge side lined up with the top of the jacket. You'll want to leave about an inch overhang of the denim band on each side. Stitch together.
 Turn your jacket wrong side down. Fold the collar up and over the back of the jacket. Press. It should look something like this from the back:
 Now you'll want to finish the edges of the collar. I just folded the raw edge under and pinned, like below:
 Top stitch along the outer edge of the collar. I did two lines of top stitching, just for looks.


Cutting out your pieces.
Start with an old pair of jeans and a sweatshirt, jacket or sweater the size you want the jacket to be. You'll use this as a guide when cutting out your pieces.


Next, cut off the waist band of the jeans. You'll want to leave a half inch of denim BELOW the thick waist band so that you can later sew it onto the jacket. (This will become the bottom edge & cuffs of the jacket.)

Next, you'll want to cut a long strip of denim out of the pant leg. I didn't measure this, but it was about 5 inches by 24 inches. Iron this in half, wrong sides together, like below.
Sewing it together.
Take your two front pieces and iron the inside edge toward the wrong side 1/4 inch, then again a 1/2 inch. Pin, then stitch.


Next, take your sleeve pieces and with right sides together, stitch up the open side. Turn right side out. Press.


Now let's add some pockets. I made one pocket for each side. Take the back pockets of your jeans, and cut into a teeny, tiny pocket to fit your jacket, using the finished top edge of the jeans pocket as the finished top edge of your jacket pocket. Pin onto jacket. Zig zag stitch around the sides and bottom to secure on.

Finally, I added some little buttons along the left side of the jacket. There are no button holes on the right side, so these are just for looks, but I didn't think it was necessary to actually button up the jacket. You could certainly add the button holes, or use snaps, or whatever you can dream up.

Hooray! We're done! If you're still following along, congrats. I hope that you aren't passed out on your sewing table or pulling your hair out. I really am NOT an expert sewer, so this project is not as scary as it may seem! I promise.
Anyway, it's a totally customizable project for a boy or a girl...change the buttons, add some appliques, use a colored denim? The possibilities are endless!

No need to spend big bucks at the mall.
Go ahead and rescue an old pair of jeans from the trash,
and make your little 80's child at heart their very own jean jacket for free!
Linking up to:
16 comments:
Yes!! But no bedazzle D? I think Baby G needs some bling ;)
You have seriously outdone yourself on this one! I LOVE it!
hi danielle :) just found your blog thru another blog (i seriously need to quit reading blogs right now and get something done today) but i just wanted to let you know that i think your photos, ideas, sewing projects, etc are all completely awesome and i'll be back when i have more time to blog stalk you even further :)
I've been waiting to check this out all day. It is adorable-I'm very impressed with your thriftiness and talent! Great job Dani.
This is adorable!!!! Love it!
XO
Kristin
oo that's super cute and a great idea!
This is so awesome!! I linked to your tutorial on Craft Gossip Sewing:
http://sewing.craftgossip.com/tutorial-denim-jacket-for-baby-out-of-an-adult-pair-of-jeans/2011/04/07/
--Anne
kye...like ur blog..
love it, Baby G!..thanks for the tute...
its look so gorgeous..
I love this,what a great tutorial, well done! I can actually follow along with this one, now I just need some little ones to make this for! I'm bookmarking this page for sure!! FABULOUS!!!
I love it. I have my little girl, I have pair of old jeans and I have your tutorial. All I need :)
hiya , well done with this , your baby will be the best dressed baby x it is fab and the turorial is ver detailed and easy to follow , tfs
xmaggiex
hiya me again , forgot to sya i mavisiting from fingerprints on the fridge and am your newest follower hope you can stopby mine and follow me too xmaggiex
This is so adorable!!! You are amazing my friend!!!
From one 80s lover to another...you are featured this week!
What a fabulous upcycle, D! Love it!
Thanks for linking up to Creative Juice...
{I just scored an amazing 80s Madonna record for my closet re-do... gotta love the SalARmy!}
Great job! Upcycle projects are my favorite! I have a few pairs of jeans I have been looking for something to "do" with. Now, if only I had a tiny baby to make this for...
This is a really awesome project. I may make one for myself
Post a Comment